Heading out on a camping trip doesn’t mean you have to sacrifice your morning ritual of enjoying a freshly brewed cup of coffee. In fact, with the right tools and techniques, you can still savor a delicious cup of coffee even when you’re in the outdoors. One popular solution is to make coffee with a camping percolator, which is a trusty companion for many campers due to its portability and ease of use.
Camping percolators come in different shapes and sizes, but their basic function remains the same: brewing coffee with the help of hot water and steam pressure. With a little bit of practice, you’ll be able to master the art of making coffee with a camping percolator.
What You Need To Make Coffee With a Camping Percolator
Essential Equipment
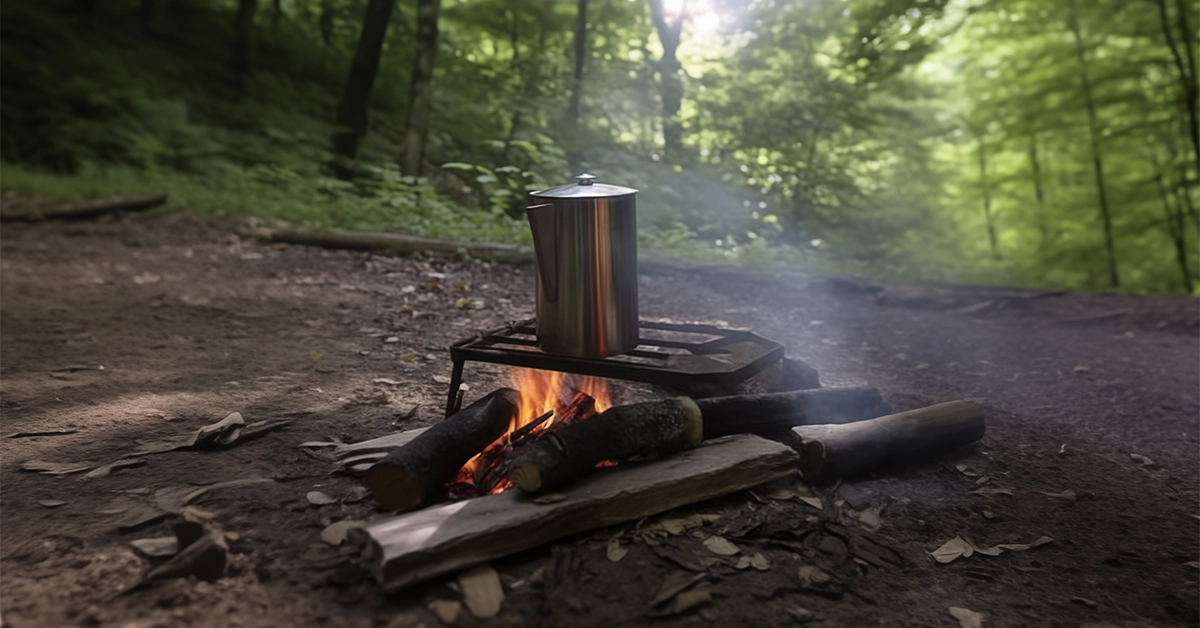
When preparing for a camping trip, it’s important to have the right equipment for making coffee. First and foremost, you’ll need a camping percolator. These are designed to be durable and portable, making them perfect for outdoor use. Next, you’ll need a heat source, such as a campfire or a portable stove. If you’re using a campfire, an adjustable grate can be helpful to control the heat.
I always make sure to pack some extra fire-starting supplies, such as matches or a lighter, as well as a camping pot holder or gloves to safely handle the hot percolator.
by Coletti
Pros:
- Made from stainless steel instead of aluminium
- Lifetime replacement guarantee
- Can brew up to 14 cups
Cons:
- Cheaper products exist but Coletti is a trusted camping brand
Coffee Essentials
To make coffee with a camping percolator, you’ll need a few key items. First, you’ll need your coffee beans. I prefer bringing whole beans and grinding them on-site for the freshest taste. Therefore, a portable coffee grinder is an essential part of my camping gear. However, if you prefer pre-ground coffee, you can skip the grinder.
Next, you’ll need water to brew the coffee. Make sure to bring enough fresh, clean water for both drinking and coffee-making purposes. Finally, you’ll need measuring tools to determine the correct amount of coffee grounds and water to use. I typically use a small kitchen scale to measure my beans and a measuring cup for the water.
Additional Supplies
Apart from the basic equipment needed to make coffee with a camping percolator, several additional items can enhance your coffee-drinking experience while camping. Don’t forget to bring cups or mugs to enjoy your coffee. Packing a travel-sized container of sugar, cream, or other flavorings can make your coffee feel more like a treat on those chilly camping mornings.
I also like to bring a few extra items to make the coffee-making process smoother and more enjoyable. For example, a portable camping chair to relax in while waiting for the coffee to brew, and a waterproof bag for my coffee gear, just in case the weather turns wet.
Choosing the Right Coffee and Percolator

Types of Coffee Suitable for Percolation
When making coffee with a camping percolator, it’s important to choose the right type of coffee grounds. Coarse-ground coffee is the best choice for percolation since it allows the water to flow through the grounds evenly, extracting the flavors effectively. Remember, using finely ground coffee can cause over-extraction and lead to unpleasant, bitter flavors.
Different Types of Camping Percolators
To make coffee with a camping percolator, you’ll choose one type of percolator for your camping trip and each has its own pros and cons. Some of the most common materials used for camping percolators include:
- Stainless steel: Durable, resistant to corrosion, and easy to clean.
- Enamel: Lightweight, resistant to scratches, and colorful designs.
- Aluminum: Lightweight, affordable, but less durable than stainless steel.
The Coffee-Making Process with a Percolator

Step-by-Step Guide on how to make Coffee with a Camping Percolator
- Measure and grind the coffee beans: Use a coarse grind for best results. The amount of coffee you need will depend on the size of your percolator and your preferred strength.
- Add coffee to the percolator basket: Place a coffee filter (if you have one) in the basket, then add the ground coffee. Spread it evenly to ensure proper brewing.
- Fill the percolator with water: Add enough water to reach the designated line or just below the basket. Be careful not to overfill, as this may cause the coffee to overflow during the brewing process.
- Assemble and place on the heat source: Put the basket and lid on the percolator, securing them properly. Place it on your preferred heat source – this could be a campfire, camping stove, or propane burner.
- Monitor the brewing process: Keep an eye on the percolator, adjusting the heat as needed to maintain a gentle boil.
- Wait for the perfect brew time: Allow the coffee to percolate for approximately 5-10 minutes, depending on your desired strength.
- Remove from the heat source and enjoy: Carefully remove the percolator from the heat, allowing it to cool for a minute before serving a delicious hot cup of camping coffee.
Heating Techniques
When it comes to heating techniques, there are several options for making your camping coffee. You can use a campfire, camping stove, or a propane stove. If you’re using a campfire, place the percolator on hot coals or a grate above the fire for more control over the heat. With a camping or propane stove, simply adjust the burner to maintain a steady temperature.
Percolation Time and Temperature Control
Percolation time and temperature control are crucial for the perfect cup of brewed coffee. For a milder coffee, a shorter percolation time of around 5 minutes will suffice. For a stronger taste, let it percolate for closer to 10 minutes. Keep an eye on the water temperature, making sure it’s hot but not boiling, and adjust the heat source accordingly. By paying attention to these factors, you’ll enjoy a satisfying and flavorful cup of coffee while camping.
| Time | Result |
|---|---|
| 5 Minutes | Mild Taste |
| 5-10 Minutes | Stronger Taste |
Tips for the Perfect Cup
- Coffee-to-Water Ratio Recommendations
During my camping trips, I’ve found that maintaining the right coffee-to-water ratio is essential for a perfect cup of coffee with a percolator. A general guideline I follow is using one tablespoon of coffee grounds for every six ounces of water. This ratio works for most people, but you can adjust to your personal preference. - Adjusting Strength and Flavor
For those who prefer stronger coffee, simply use more coffee grounds. For a more mild and subtle flavor, reduce the amount of coffee used. I suggest experimenting with different types of coffee beans and grind sizes, as this can also significantly impact the taste. A manual coffee grinder can be essential during camping trips, allowing you to control the coarseness of the beans. - Avoiding Common Mistakes
When you make coffee with a camping percolator, it’s important to be aware of some common mistakes that I’ve learned to avoid. One crucial step is not to overcook the coffee. Once the water starts boiling, take the percolator away from the direct flame to lower the heat, and let it percolate for 5 to 10 minutes2. Over-brewing can lead to a bitter, undesirable taste.
💡Protip
Use Coffee Filters
Although not required, I’ve found that using a filter in the basket of a camping percolator can help produce a cleaner cup of coffee with less grit.
Tips for Cleaning and Maintaining the Percolator
Now, that you know how to make coffee with a camping percolator, it’s important to keep your camping percolator in top shape. Here are a few tips I follow to do just that:
- Cleaning the parts: After each use, I disassemble the percolator and wash all the parts (pot, lid, stem, tube, basket, handle, and stand) with warm, soapy water. I make sure not to use any abrasive materials that could scratch the surfaces.
- Removing mineral deposits: Over time, mineral deposits can build up in the percolator, affecting the taste of my coffee. To remove these deposits, I fill the pot with a mixture of equal parts water and white vinegar and let it sit for a few hours or overnight. Then, I rinse it thoroughly with water and allow it to dry.
- Store it dry: Before putting my coffee percolator away, I ensure that all parts are completely dry to avoid any chance of mold or mildew growth during storage.
By maintaining a clean and properly stored percolator, I can consistently enjoy delicious coffee during my camping adventures, no matter which portable and lightweight coffee percolator I bring along!
There are more ways to make coffee while camping. Check out our blog post on how to make coffee without electricity for more ideas.
FAQ – How to Make Coffee With a Camping Percolator
How long do you let camp coffee percolate?
When it comes to preparing coffee using a camping percolator, I have found that the ideal percolation time is around 15 minutes. However, allowing the percolator to rest for an additional 5-10 minutes after percolating can help the grounds settle at the bottom, ensuring a better taste and texture for your coffee source.
How do you make coffee in a percolator?
Here’s how to make coffee with a camping percolator:
1. Fill the pot with water.
2. Disassemble the percolator and add a filter (optional).
3. Add coffee grounds to the filter, using about one tablespoon per cup of water.
4. Reassemble the percolator and place it on the heat source.
5. Heat on high until water begins to boil.
6. Lower the heat and let the coffee percolate for about 15 minutes or until it reaches your desired strength.
7. Remove the percolator from heat and let it rest for 5-10 minutes allowing the grounds to settle source.
Do you use a filter with a camping percolator?
Using a filter in a camping percolator is optional. Using a filter can help with keeping the coffee grounds out of the final brew, resulting in a cleaner tasting coffee. However, some people prefer the robust flavor of coffee made without a filter. It ultimately depends on your personal preference and desired coffee taste source.
Can you use regular coffee in a percolator?
Yes, you can use regular coffee in a percolator. However, it’s essential to choose the right grind size. Finer grinds will result in over-extracted coffee with bitter taste. And in contrast, a coarse grind will be weak and watery.
If you liked our blog post on How to Make Coffee With a Camping Percolator, don’t forget to leave us a comment down and share your thoughts on this topic.


